.png)
What is Visual Studio Code?
Visual Studio Code (commonly called VS Code) is a free, open-source code editor developed by Microsoft. It's lightweight, fast, and packed with powerful features like IntelliSense code completion, built-in Git support, an integrated terminal, and a massive extensions marketplace with over 40,000 extensions.
VS Code supports virtually every programming language — JavaScript, Python, HTML/CSS, C++, Java, Go, Rust, and many more — through its extension system. It's the most-used code editor in the world according to the Stack Overflow Developer Survey, preferred by over 70% of developers.
Open the official website → Download the Windows installer → Run the setup → Accept the license → Choose the installation path → Select additional tasks (like "Add to PATH") → Click Install → Launch VS Code. Screenshots for every step are included below.
System Requirements for VS Code on Windows
Before downloading, make sure your system meets these minimum requirements. VS Code is very lightweight, so most modern Windows PCs will run it without any issues.
| Requirement | Minimum | Recommended |
|---|---|---|
| Operating System | Windows 10 (64-bit) | Windows 11 (64-bit) |
| Processor (CPU) | 1.6 GHz or faster | 2.0 GHz dual-core or faster |
| Memory (RAM) | 1 GB | 4 GB or more |
| Disk Space | 400 MB | 1 GB+ (with extensions) |
| Internet Connection | Required for download | Required for extensions & updates |
Why Choose Visual Studio Code?
Installation — Step by Step
Follow these 8 simple steps to download and install Visual Studio Code on your Windows PC. Each step includes a screenshot so you can follow along visually.
Visit the Official VS Code Website
Open your web browser (Chrome, Edge, Firefox, etc.) and navigate to https://code.visualstudio.com/. This is the official Microsoft page — always download from here to avoid modified or unsafe installers.
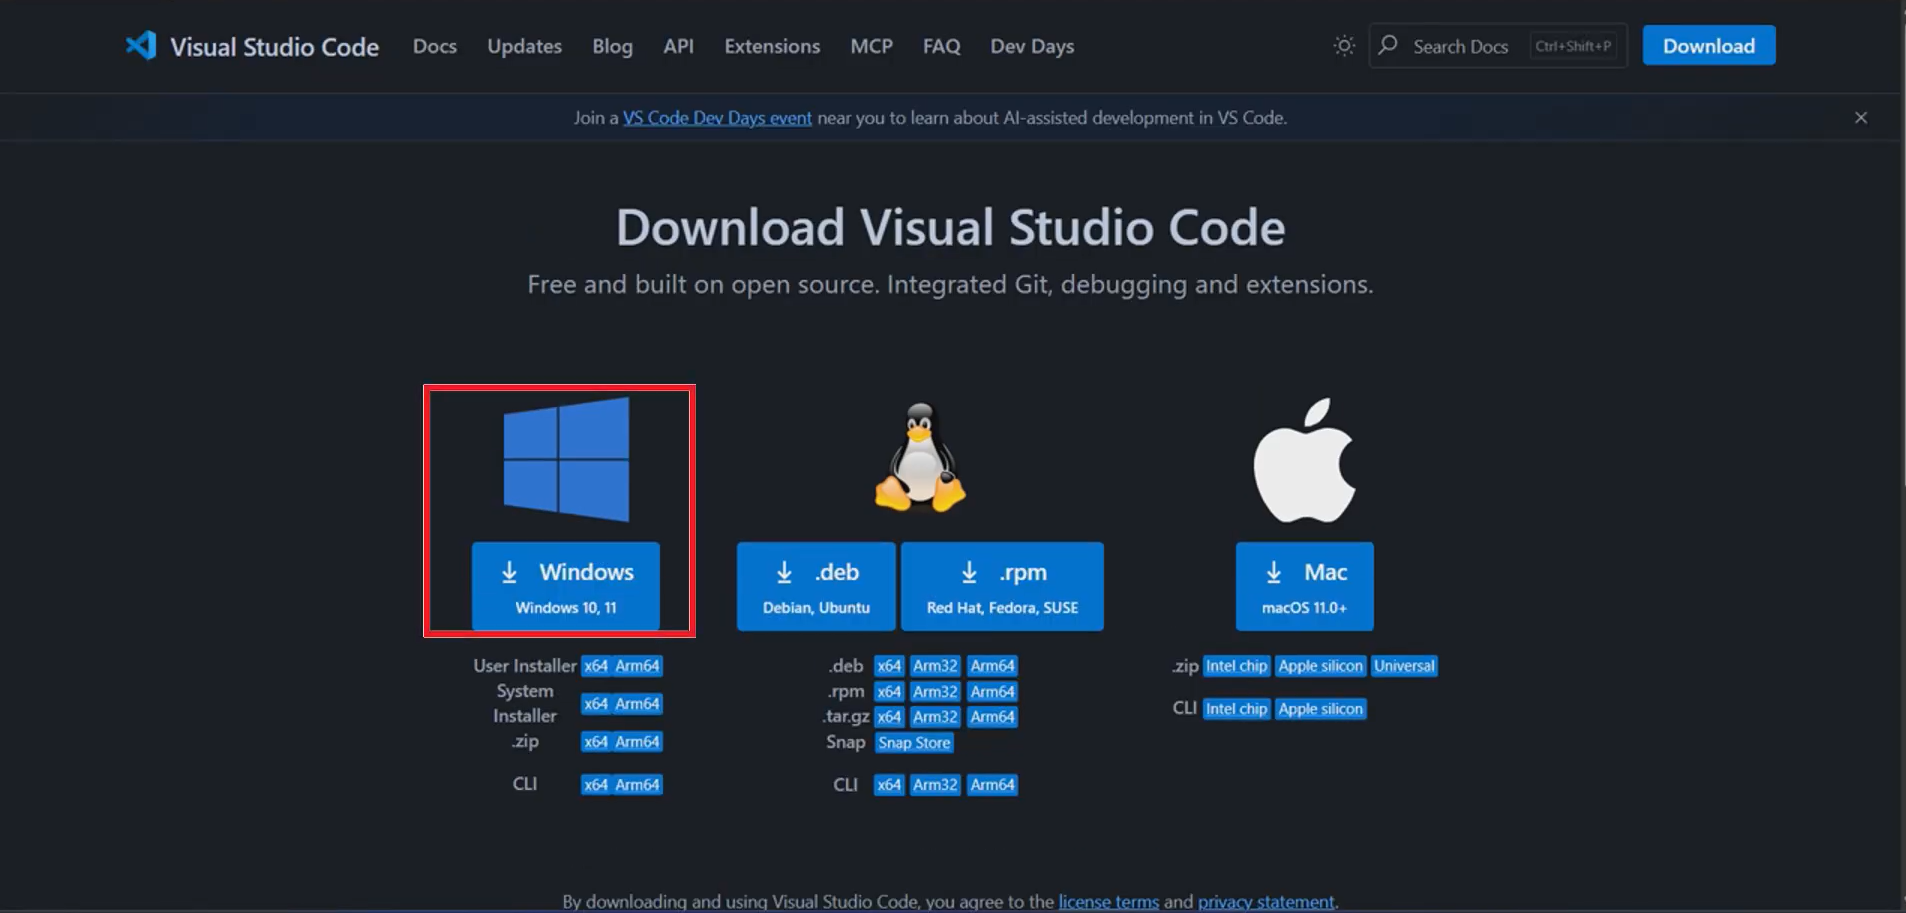
The official Visual Studio Code download page
Download the Windows Installer
Click the "Download for Windows" button. The website will automatically
detect your system and offer the correct .exe installer (usually
User Installer for 64-bit Windows). The file
VSCodeSetup-x64-*.exe will be saved to your Downloads folder.
Click "Download for Windows" to get the installer
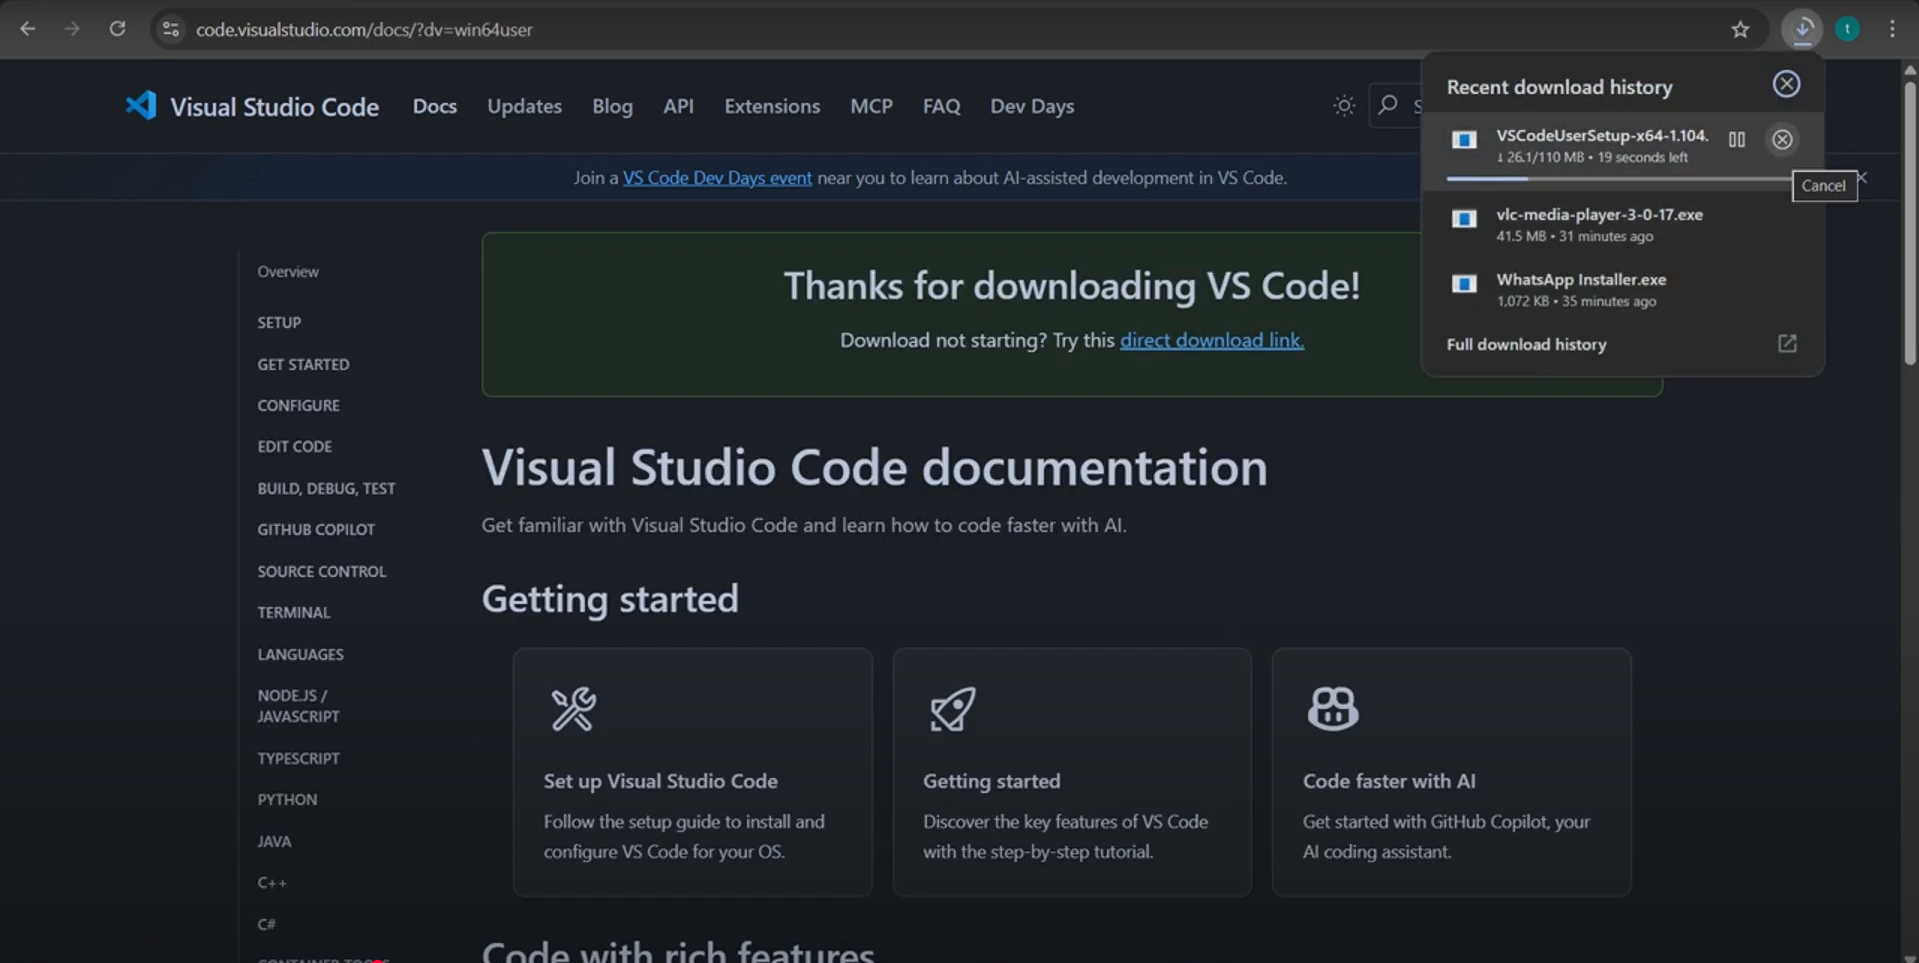
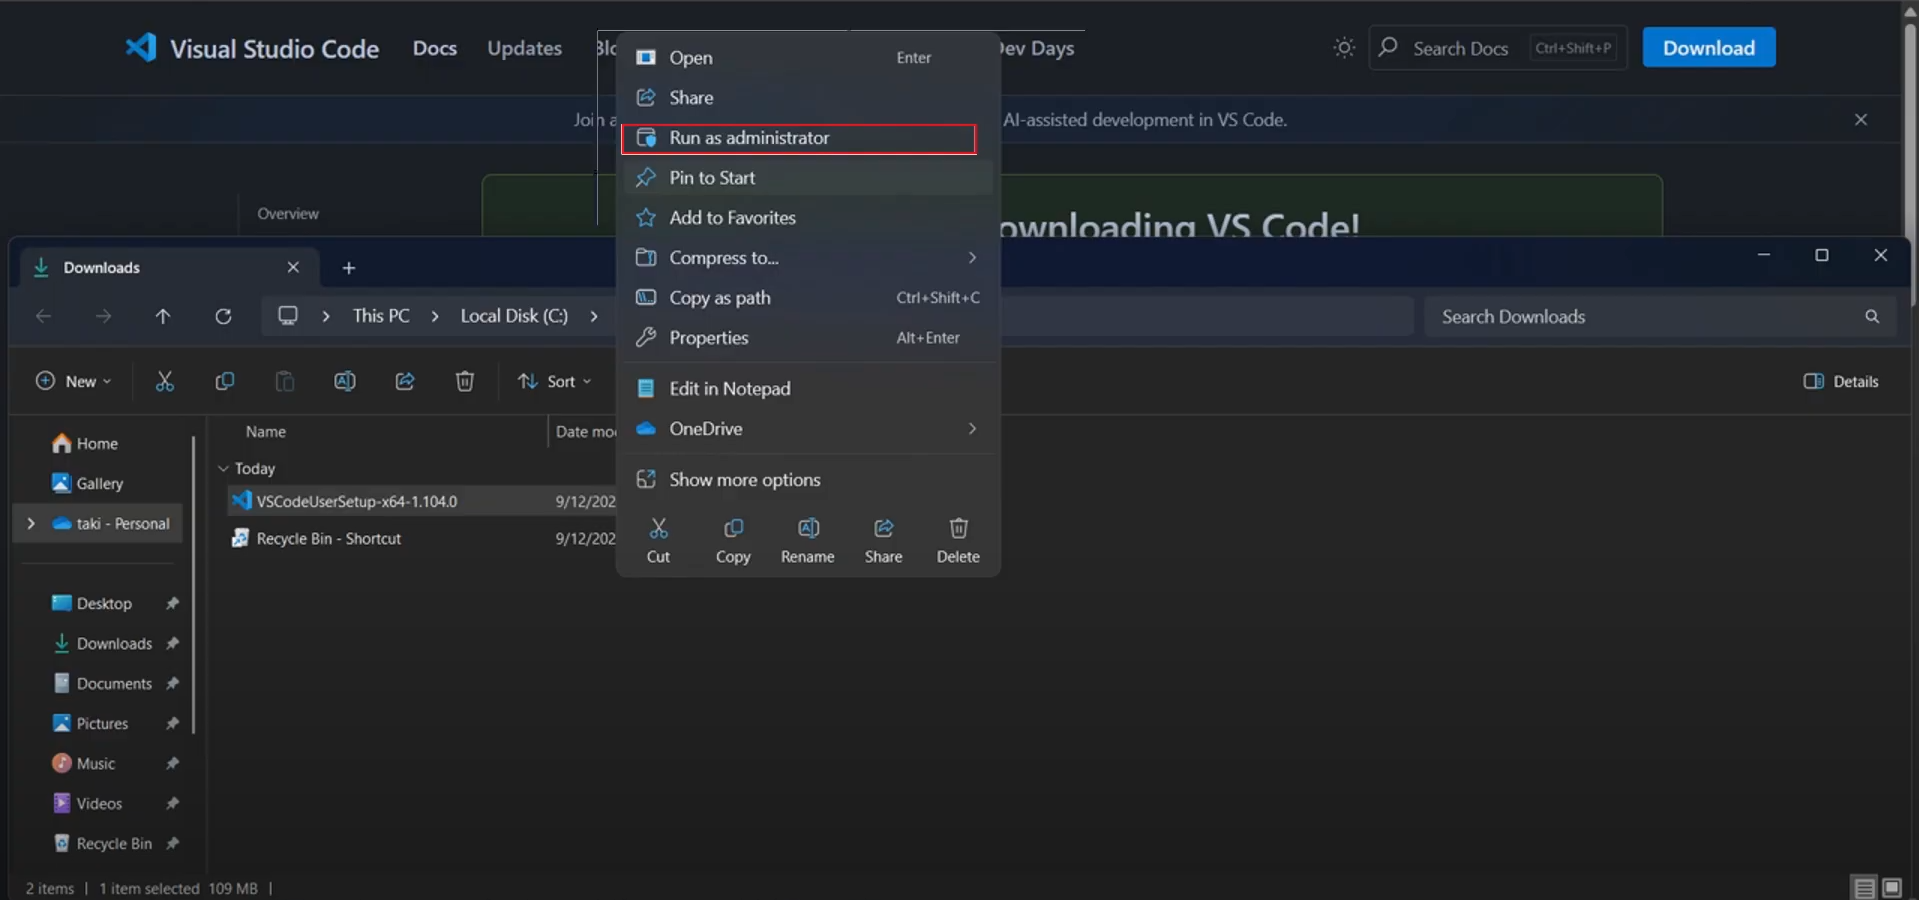
Run the Installer
Open your Downloads folder and locate
VSCodeSetup.exe. Double-click the file to launch the installation wizard.
If Windows shows a "User Account Control" prompt asking "Do you want to allow this app
to make changes?", click Yes.
The VS Code setup wizard welcome screen
Accept the License Agreement
Read the license agreement (it's the MIT License — very permissive), select "I accept the agreement", and click Next to continue with the installation.
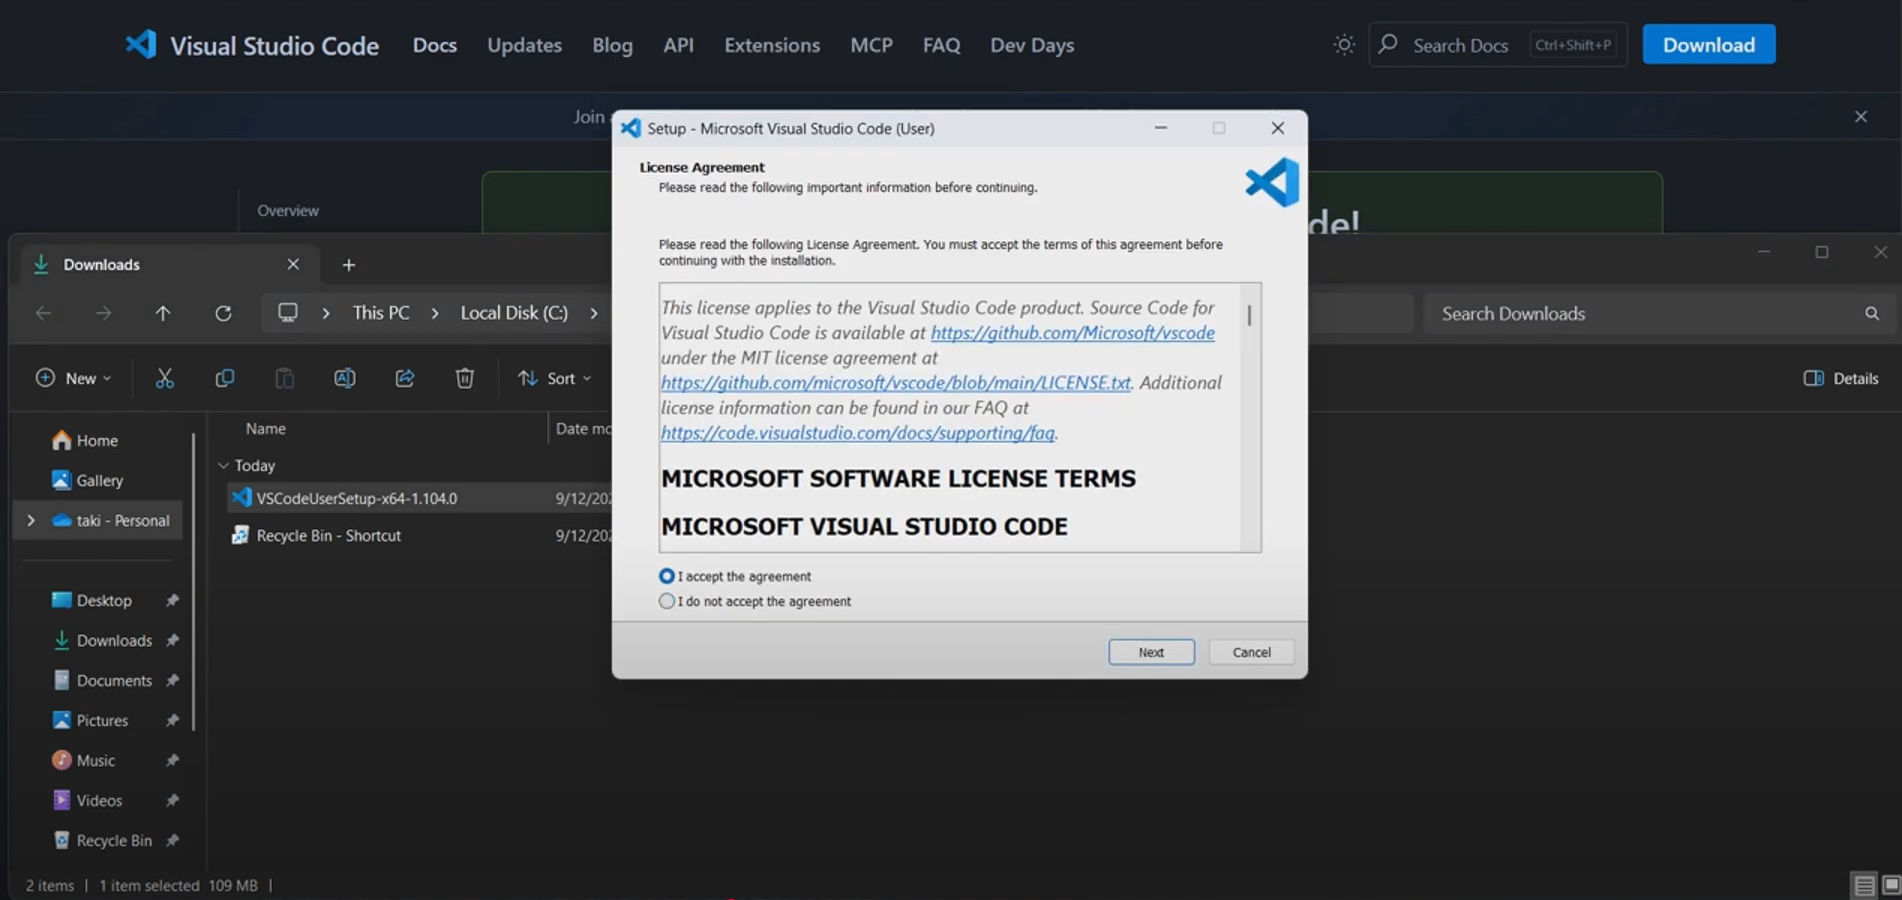
Accept the MIT license agreement to proceed
Choose the Installation Location
Select the folder where VS Code will be installed. The default path is usually
C:\Users\[YourName]\AppData\Local\Programs\Microsoft VS Code.
You can keep the default or click Browse to choose a custom location,
then press Next.
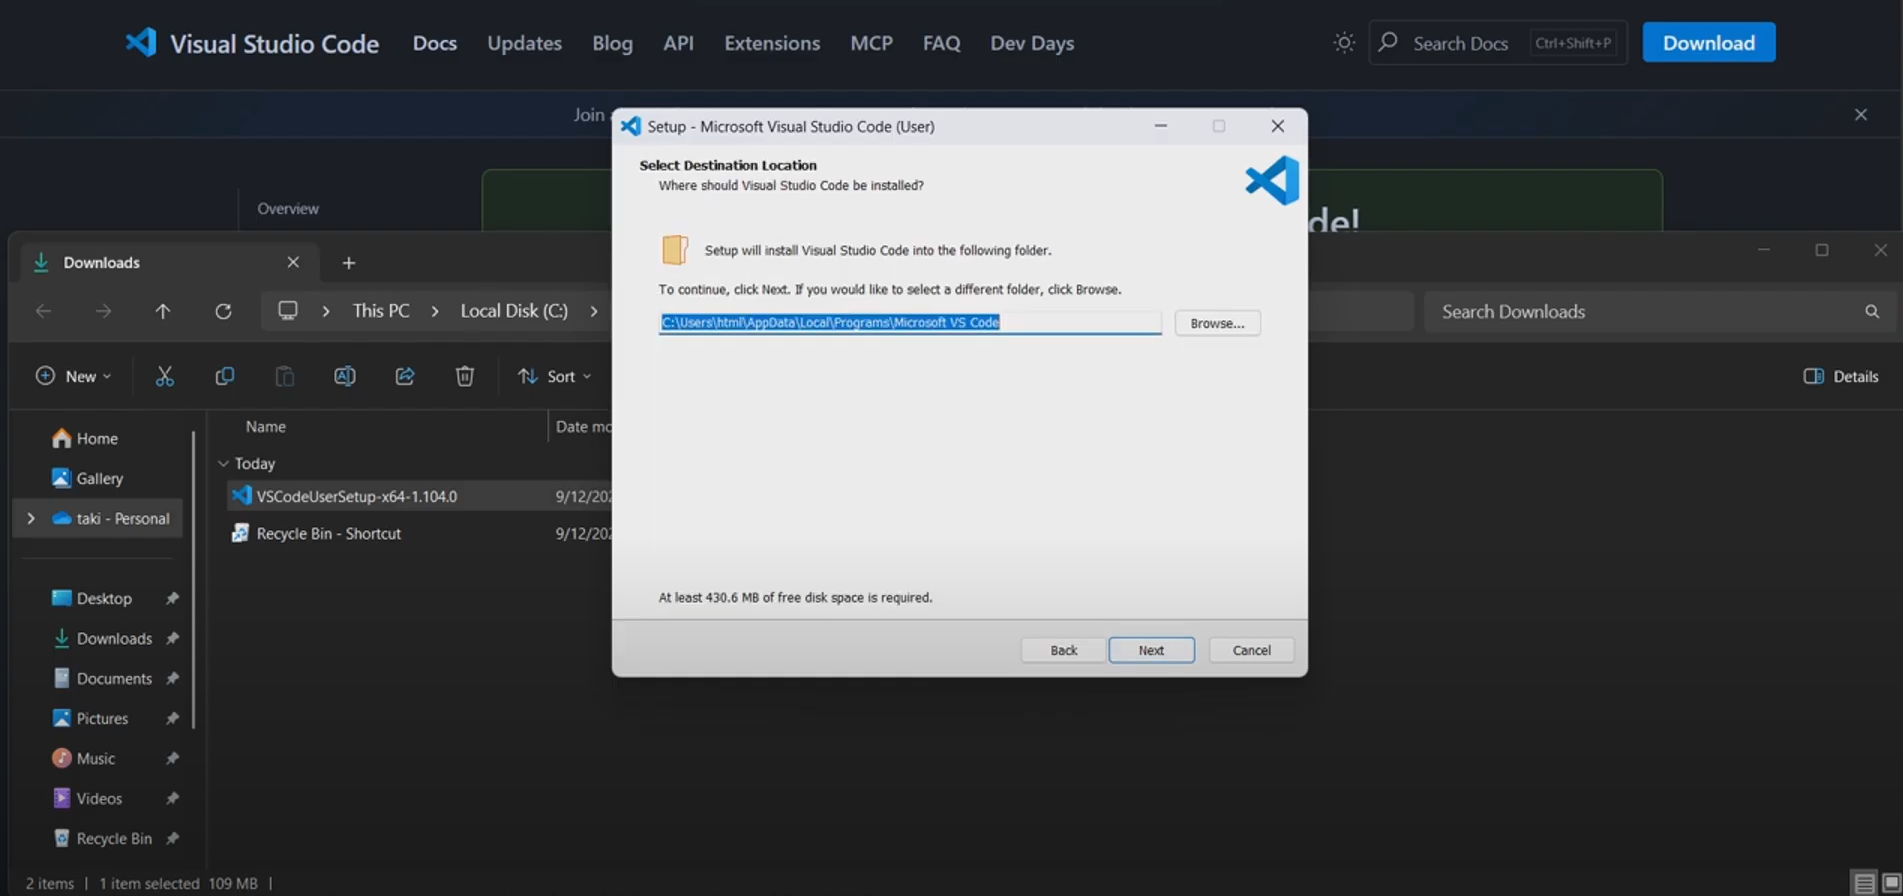
Choose where to install VS Code on your drive
Select Additional Tasks
This is an important screen. Here are the recommended options to check:
- Add "Open with Code" action to Windows Explorer file context menu — right-click any file to open it in VS Code
- Add "Open with Code" action to Windows Explorer directory context menu — right-click any folder to open it as a project
- Register Code as an editor for supported file types — makes VS Code the default for .js, .py, .html, etc.
- Add to PATH — allows you to type
codein any terminal to open VS Code - Create a Desktop Shortcut — quick access from your desktop
After selecting your options, click Next.

Select additional tasks — "Add to PATH" is highly recommended
Install Visual Studio Code
Click the Install button to begin the installation process. This typically takes 30 seconds to 2 minutes depending on your system speed. Wait for the progress bar to complete.
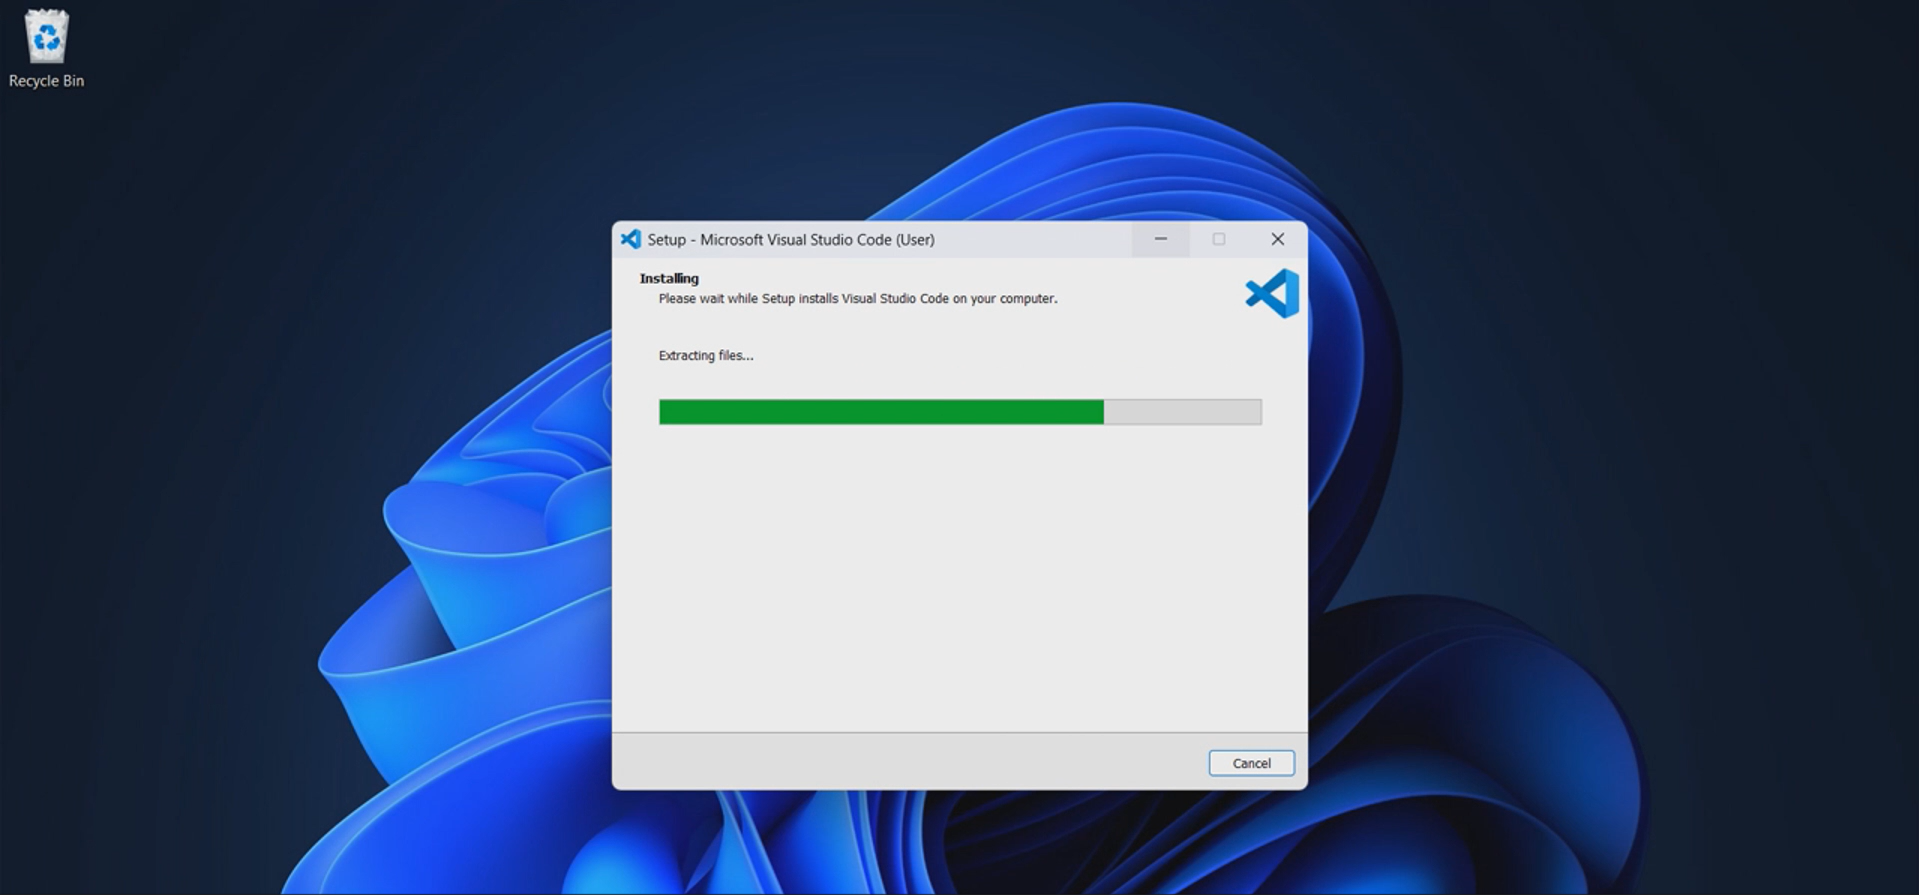
Installation in progress — wait for it to finish
Launch Visual Studio Code
Once the installation is complete, check the box labeled "Launch Visual Studio Code" and click Finish. VS Code will open immediately, and you'll see the welcome tab with quick-start options.
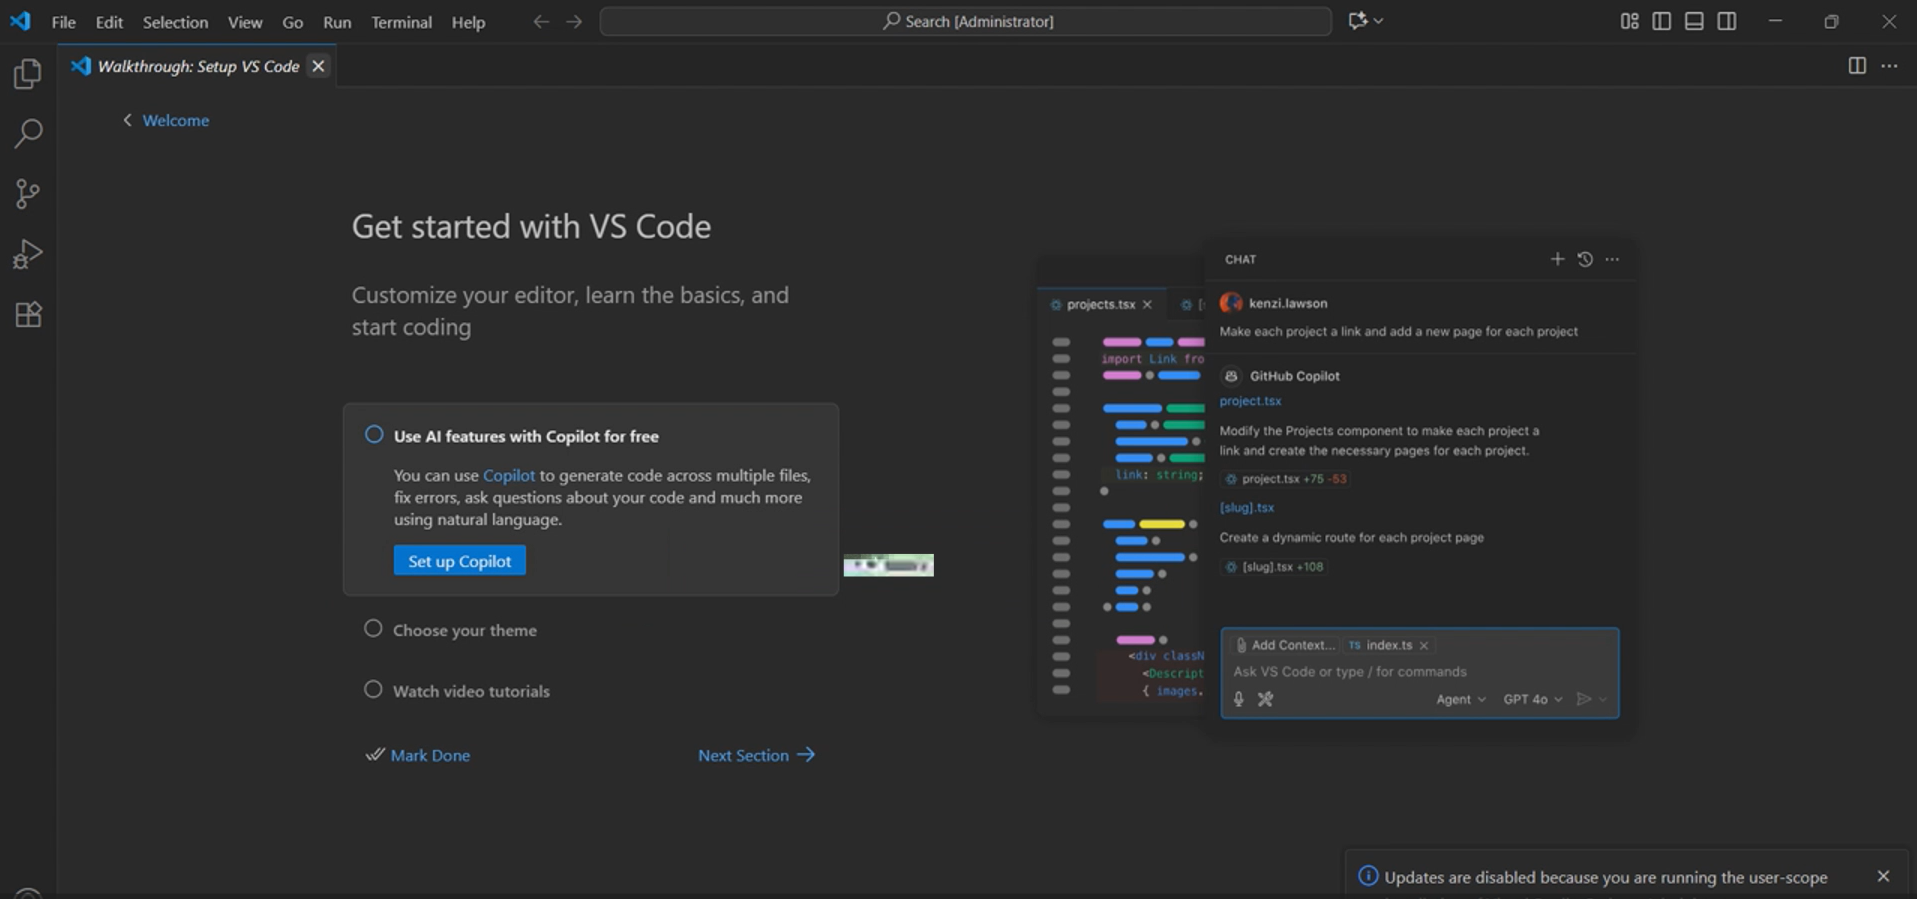
Check "Launch Visual Studio Code" and click Finish
Ctrl+Shift+P → type
shell command → select "Shell Command: Install 'code' command in PATH".
After Installation — What to Do Next
Now that VS Code is installed, here are the first things you should do to set up your development environment properly:
Install Essential Extensions
Click the Extensions icon in the sidebar (or press Ctrl+Shift+X)
and install must-have extensions like Prettier (code formatting),
ESLint (JavaScript linting), Live Server (local dev server),
and language-specific extensions for your stack.
Change the Theme
Go to File → Preferences → Color Theme (or Ctrl+K Ctrl+T)
and pick a theme you like. Popular choices include Dark+ (default dark),
One Dark Pro, GitHub Dark, and Ayu Dark.
Open Your First Project
Go to File → Open Folder (or Ctrl+K Ctrl+O) and select
a folder on your computer. VS Code will show your files in the Explorer sidebar, and
you can start editing immediately.
Try the Integrated Terminal
Press Ctrl+` (backtick) to open the built-in terminal. You can run
npm install, git commands, python scripts, and
more — all without leaving VS Code.
Enable Auto Save
Go to File → Auto Save to enable automatic file saving. This prevents you from losing work if you accidentally close the editor or your computer crashes.
Best Practices & Common Mistakes
- Always download from the official
code.visualstudio.comwebsite - Check "Add to PATH" during installation
- Enable "Open with Code" context menu options
- Keep VS Code updated for security and performance fixes
- Install only necessary extensions to keep the editor fast
- Use the User Installer (not System Installer) for personal use
- Download VS Code from third-party sites or unofficial sources
- Skip the "Add to PATH" option — you'll need it for terminal usage
- Install too many extensions at once — it slows down startup time
- Use the System Installer unless you're an IT admin managing shared machines
- Ignore update notifications — they often include important security patches
- Store large project files directly on the VS Code installation drive if space is limited
Frequently Asked Questions
Is Visual Studio Code free?
What are the system requirements for VS Code on Windows?
Should I add VS Code to PATH during installation?
code. It also enables shell
integration features and makes it possible to use VS Code as the default editor for tools
like Git. If you skipped this during installation, you can add it later from the command
palette (Ctrl+Shift+P → "Shell Command: Install 'code' command in PATH").
Can I install VS Code on Mac or Linux?
.zip or .dmg file from the official website. For Linux, choose
your package format: .deb (Debian/Ubuntu), .rpm (Fedora/RHEL),
or .tar.gz (universal). You can also install via package managers like
brew install --cask visual-studio-code on macOS or
sudo apt install code on Ubuntu.
How do I update Visual Studio Code after installation?
What is the difference between Visual Studio and Visual Studio Code?
Conclusion
Congratulations! You've successfully downloaded and installed Visual Studio Code on Windows in just 8 simple steps. VS Code is now ready to use — you can open files, install extensions, customize your theme, and start building projects right away.
To get the most out of VS Code, make sure you've added it to PATH, enabled the context menu options, and installed the essential extensions for your development stack. Check out the related tutorials in the sidebar for more guides on setting up your coding environment.
Found this guide helpful? Explore the related projects below for more tutorials and modern front-end UI components.